Grid-EM11.com
a work in progress....
Baylor Merit Badge College

Electronics Merit Badge
Baylor University will be hosting the Baylor Merit Badge College. In past years, I have taught Signaling Merit Badge and Radio Merit Badge. This year, I have been asked to teach the Electronics Merit Badge.
This webpage is my way of being able to provided the Scouts taking my class with all of the information that they may need to be successful in completing this merit badge.
Electronics is the science that controls the behavior of electrons so that some type of useful function is performed. Today, electronics is a fast-changing and exciting field.
Requirements
- Describe the safety precautions you must exercise when using, building, altering, or repairing electronic devices.
- Do the following:
- Draw a simple schematic diagram. It must show resistors, capacitors, and transistors or integrated circuits. Use the correct symbols. Label all parts.
- Tell the purpose of each part.
- Do the following:
- Show the right way to solder and desolder.
- Show how to avoid heat damage to electronic components.
- Tell about the function of a printed circuit board. Tell what precautions should be observed when soldering printed circuit boards.
- Discuss each of the following with your merit badge counselor, and then choose ONE of the following and build a circuit to show the techniques used:
- Tell how you can use electronics for a control purpose, and then build a control device circuit.
- Tell about the basic principles of digital techniques, and then build a digital circuit. Show how to change three decimal numbers into binary numbers and three binary numbers into decimal numbers.
- Tell about three audio applications of electronics, and then build an audio circuit.
Show how to read the schematic diagram of the project you chose and, to the best of your ability, explain to your counselor how the circuit you built operates.
- Do the following:
- Show how to solve a simple problem involving current, voltage, and resistance using Ohm's law.
- Tell about the need for and the use of test equipment in electronics. Name three types of test equipment. Tell how they operate.
- Find out about three career opportunities in electronics that interest you. Discuss with and explain to your counselor what training and education are needed for each position.
Workbook
In order to simplify the documentation for completing this Merit Badge, I will be handing out a Workbook for each of you to use.
If you need another copy of the Workbook you can get it here.
This workbook can help you but you still need to read the merit badge pamphlet.
The work space provided for each requirement should be used by the Scout to make notes for discussing the item with his counselor, not for providing the full and complete answers. Each Scout must do each requirement.
Presentation
The PowerPoint Presentation I will be using to teach the class can be found here.
Project
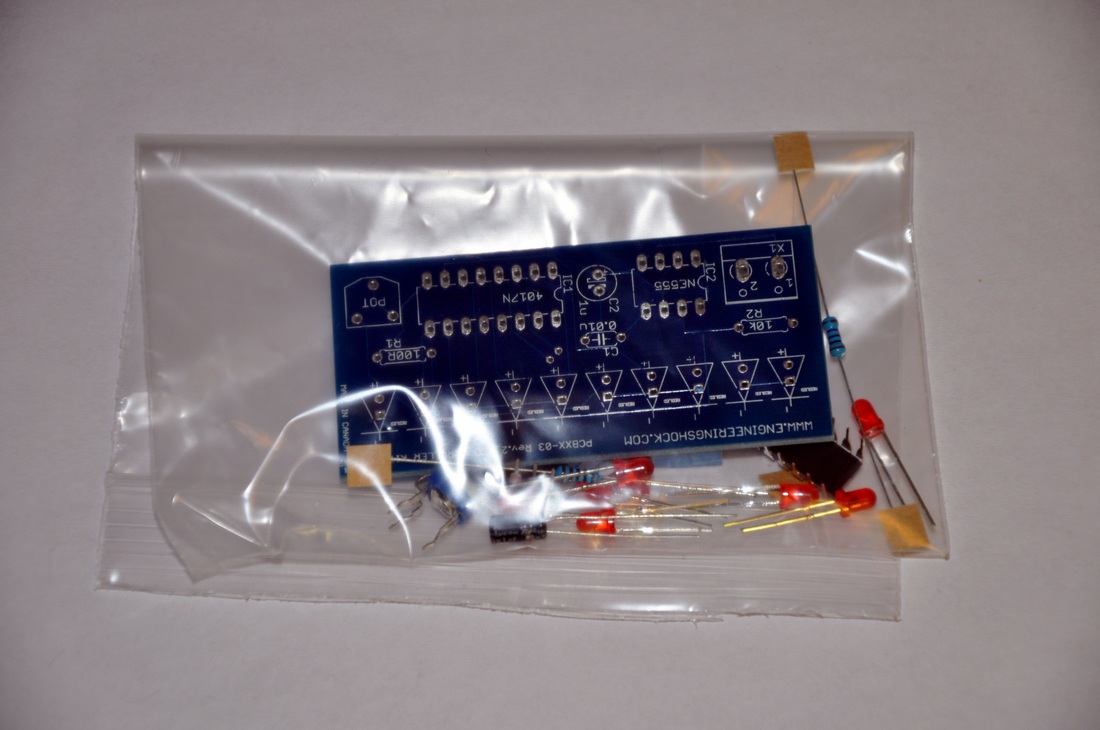
We will be building a Digital Project as part of this class. Most of you will be buiding this kit from engineeringshock.com

Past Years Projects
LED scroller DIY electronics kit
with ten LEDs and variable speed adjustment
This listing is for a red LED scroller DIY kit. The LEDs scroll from left to right, and you can change the speed by adjusting an on board variable resistor. A demonstration can be seen in the below video. The video also acts as the instruction manual for this kit. It shows you how to put it together piece by piece. It also talks a little about the schematic. This kit is based off of the 555 timer, and the CD4017 counter IC. It features 10x 3mm red LEDs. The 555 timer is set up in astable mode, and it creates a square wave. Each pulse from the 555 timer acts to trigger an action in the CD4017 counter IC. The output of the 555 timer is connected to the input clock pin of the CD4017. Each time a pulse hits the clock input, the logic on the output of the CD4017 increments. By this, it is meant that if LED#1 is on, and a pulse hits the clock input of the CD4017, then LED#1 will be turned off, and LED#2 will turn on, and so fourth. We also sell a three LED colour version of this kit for a dollar more.
DIY Decision Maker Kit
Featuring 8 Responses and Red LED Indicators
This listing is for an electronic decision maker kit. When you press the on-board button, the device scrolls to the random decision made by software. The above video acts as the instruction manual, and it talks about the functionality. As well, the video shows you step-by-step how to put the kit together! This kit can be powered using a DC source between 7vdc-15vdc. A 9v battery will work just fine! This kit comes with all of the components necessary to create this kit from scratch, including the custom PCB and 8x red 3mm LEDs. Use the video to put it all together. We also offer this kit with three different coloured LEDs, so check our our store! The circuitry is regulated to 5v. The following are the responses from the decision maker. These responses are labelled on the custom printed circuit board:
- YES, DEFINITELY!
- ASK LATER
- MY PROGRAM INDICATES...NO
- MOST LIKELY...
- YOU DON'T WANT TO KNOW...
- MAYBE!
- YOU BETTER BELIEVE IT!
- UNSURE, ASK AGAIN...
Theramon Video
Scroller Video
Decision Maker Video